*first posted in 2016, this lesson has been updated for grades 2-3 e-learning in 2020, but can be used & modified for any and all grade levels
 |
| This exceptional project from a first grader used multiple points of view! |
 |
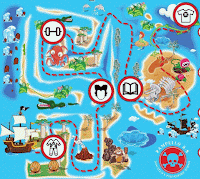
| Rampello K-8's Spirit Week Map |
Materials:
- Practice paper
- Pencil & Eraser
- Paper for the map (white, manilla, brown paper bag, tea-stained, textured, any type and size you want to use!)
- Drawing media that shows up well against your background paper (markers, paints, oil pastels, crayons, construction paper crayons, etc.)
 |
A little sparkle or shine goes a long
way! We used dried markers to
apply tiny metallic tempera details.
|
- Optional: metallic paint, glitter glue, sequins, ribbon or yarn, magazines for collaging, really anything you have laying around the house. Get creative & crafty, or at least give them the opportunity to do so!
Good To Have On Hand:
(Resources & Preventative Measures)
- Compass Rose
- Map- any type will do, just check your car's glove box! This comes in handy as a real-life example of how a compass rose, map key, and areal view can be used. This is also a great tie-in with geography and giving & writing directions.
- Old fashioned map examples with sea creatures and symbols. (find online)
- Smock/apron and wipes or damp paper towels (if using paint or glue)
- Newspaper or large plastic place mats (for easy clean-up)
 |
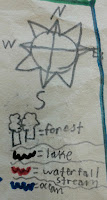
| Third grade compass rose |
- If you are tea-staining or aging your paper in any way, do this first and practice drawing any details you want to include while the paper dries.
- Decide on a size and shape for your paper. Are the edges torn or cut? Will it be rolled into a scroll or folded?
- Draw a compass rose near one of the corners (good opportunity for a geography cross curricular tie-in)
- Draw an island, archipelago, peninsula, or shoreline- basically you want part of your map to be land and part should be water.
- X marks the spot! Experiment with different ways to show your X: wooden planks, swords, palm trees, old-timey lettering etc.

I am still amazed that a
first grader drew this! - Place your ship off the coast. It can be anything from a dinghy to a multi-masted tall ship. Don't feel limited to drawing, you can cut and paste from a printout or collage together a boat if you're so inclined!
- Represent different geographical landmarks through drawing or collage (trees, caves, quicksand, cliffs, rocks, mountains, volcanoes, rivers, waterfalls, ponds, swamps, etc.)
- Draw a dotted line from your docking point to the X, winding it through and around the geography of your island.
- Show the water on the map through different types of waves.
One good way to show water is through a set of layered dashed lines clinging tightly to the shoreline. Start them small and tight near the shore, then loosen and lengthen them a few layers out.
A great example from a fifth grade
artist showing waves just off-shore. - Add in some details like sea monsters, canons on deck, flags, treasure chests etc.
SUNSHINE STATE
STANDARDS
VA.2.C.2.1- Use appropriate decision-making
skills to meet intended artistic objectives.
VA.2.S.1.1-
Experiment with tools and techniques as part of art-making processes.
VA.2.S.3.2- Demonstrate growth in
craftsmanship through purposeful practice.
VA.2.H.2.1- Identify differences or similarities
in artworks across time and culture.
VA.2.F.1.1- Use imagination to create
unique artwork incorporating personal ideas and selected media.
 |
| This fourth grader really got into the details on her map! |


No comments:
Post a Comment