Showing posts with label summer art. Show all posts

Thursday, June 18, 2015

Tunnel Book Update & Summer Institute!

by Elizabeth Van Allen  for scribblesbyartteachervanallen.blogspot.com

This student chose to shift the space
ship forward 
from the middle- to the
fore- ground while he was working
.
A few brief hours after posting my Tunnel Book lesson, I received my acceptance letter/ invitation to attend the ABC Teachers Institute at the National Museum for Women in the Arts.  To say that I am excited would be a total understatement.  Having the opportunity to spend one whole week in DC learning about book arts in the classroom with other enthusiastic educators is like a dream.  What better way to refresh my educational and personal book making practices?  It's as if this professional development opportunity was tailor-made just for me!

The student who made this book
decided to change his topic mid-
project. He 
really had to focus 
in order to finish it on time!
In light of this fabulous development, it seemed like just the right time to showcase some of my current students' finished tunnel books.  We had quite a few really nice projects this year that covered a variety of topics.  A few that really stood out were pac-man, non-representational patterns, minecraft, and math.  I love finding out which students follow their plans exactly and which ones re-configure their designs on the fly to better fit the tunnel book format.  

This student artist knew exactly
what she wanted her tunnel
book to look like from day 1.
Being pushy with my students about doing their pre-project planning really paid off this year.  About halfway through our project we were interrupted by standardized testing.  In my school testing occurs in the morning, exactly when the older students are scheduled for my class.  So while I started the project in late March, it couldn't be finished until early June.  It's a good thing I made my students plan their projects first, otherwise we might have been stranded on the archipelago of interrupted & unfinished projects!  (For those who don't know, the archipelago of interrupted & unfinished projects is located southwest of the island of misfit toys and due north of never land.) 
This student came up with the idea
to use a partial frame as a foreground
on her own.  I only showed examples
that utilized a full-frame foreground.

With summer break just coming into view, it's nice to wrap up the school year with a surprisingly successful lesson.  Crisis averted and lesson learned: I won't doubt my instincts when they tell me to do a little extra planning with students, even on a lesson that I've taught for years!

What routines do you use to keep projects from self destructing when the unexpected occurs?

Thursday, June 11, 2015

DIY: Personalizing Disney MagicBands

by Elizabeth Van Allen  for scribblesbyartteachervanallen.blogspot.com

Me at the Magic Kingdom, chatting 
with a few of my favorite characters 
about my MagicBand.  They wanted
to know why I painted the Cheshire
Cat instead of their cat Lucifer!
I love Disney World.  
What's not to love?  Between the Magic Kingdom, Hollywood Studios, Animal Kingdom and my personal favorite EPCOT, there's something for everyone.  The staff is friendly, the properties are clean, and the company wants you to have a good time.  I have stayed on-property three times in the last six years and, like all tourist destinations, the Disney World parks and hotels have been going through some changes.  One of the most obvious changes in Disney protocol is a new way that attractions and amenities can be accessed: the MagicBand.  

Our newly re-designed MagicBands
in their original packaging
MagicBands are Disney's version of a wearable digital access pass.  These waterproof, non-latex wristbands are the newest and most high-tech Disney accessory du jour.  On the outside they are streamlined and simply designed, suitable for even the most conservative among Disney's guests.  About the size of a wristwatch, they are available in a variety of colors (except for purple- they need to do something about that) and can be made child-sized by simply detaching the removable black border.  Tucked safely inside the MagicBand's streamlined exterior is an RFID chip, coiled antennae, and a battery.  The activated Magic Band can function as a room key, credit card, park ticket, and/or FastPass, allowing you instant access to just about 
A Disney Fingerprint Scanner
http://www.huffingtonpost.com/michael-nirenberg/
no-security-mickey-mousep_b_4987896.html
anything on the property without having to find your wallet.  Whether you are all for added convenience and security or wary of this increase in tracking and monitoring, it looks as if the MagicBands, coordinating MyDisneyExperience planning page & mobile app, and fingerprint scanners at the front gates are here to stay.

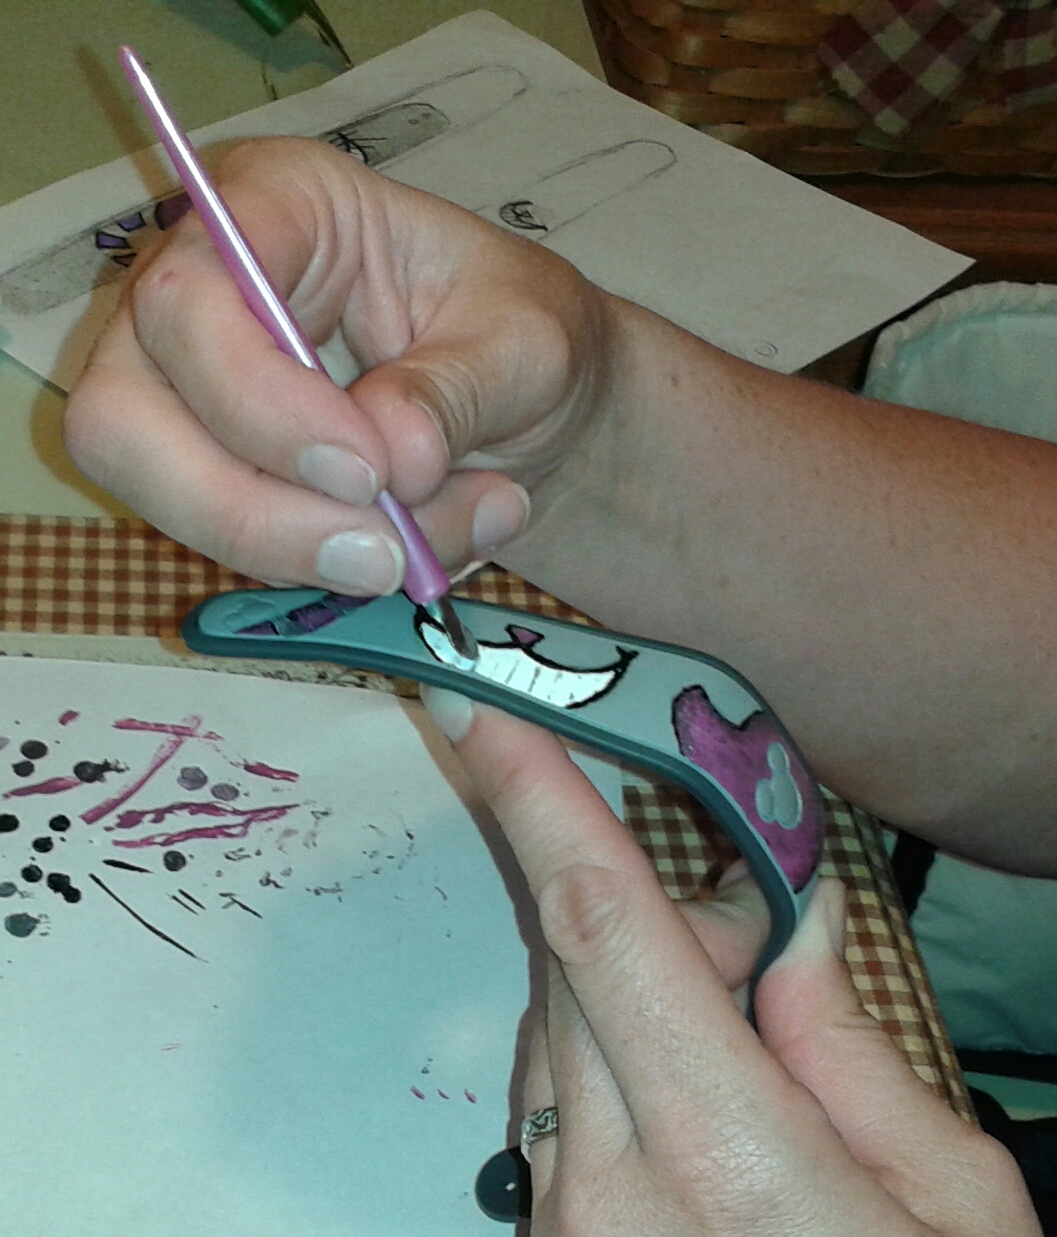
As soon as I received my MagicBand I NEEDED to personalize it.  While I appreciate the one-design-fits-all styling, as many of you know I'm a little compulsive about making things mine.  After exhaustive research, (a.k.a. obsessive pinterest and image searches) it seems that I'm not the only one out there with that idea.  In addition to the many official Disney licensed MagicBand-specific accessories (MagicBandits and MagicSliders), many people were adding temporary tattoos or painting them with nail polish.  Being the crafty artist that I am, I chose the nail polish route to style not only my MagicBand, but my Mother- and Father- in-law's bands too!

My amazing M-I-L Marilyn, modeling her
stylishly redesigned MagicBand at the
Hollywood Studios '50's Prime Time Cafe

DIY: Personalizing Your MagicBand 

Materials:

  • Paper for planning and covering your working surface
  • Pencil & Eraser
  • Nail Polish in assorted colors
  • Toothpicks or something else pointy (I used the stylus from an old scratch art set)
  • Nail Polish Remover & cotton swabs just in case

    • Directions:

      Step 2:
      Draw or transfer
      your design onto
      the MagicBand
      with a pencil.


      Step 1:
      Choose a theme
      (mine
      was Alice in Wonderland)
      ,
      then sketch up ideas
      for your MagicBand


      Step 3:
      Carefully fill in areas of solid color.
      Be sure to give the paint enough time to dry!
      Step 4: 
      Add Outlines,
      Step 4:
      Shading,


      Step 4:
      and Details


      (see right)
      Behold, the finished
      Cheshire Cat MagicBand!


      (above) My Father-in-law
      requested a NY Giants 
      theme for his band.


      (left) the Sorcerer's 
      Apprentice theme
      was an especially
      fulfilling challenge!
      The Sorcerer's Apprentice 

      Thursday, August 18, 2011

      Summer work? More like summer fun!

      As I wrap up my summer work with the Art FUNdamentals program at the Pennsylvania Academy of Fine Arts, I realize how lucky I am.  Every day I go in and make artwork with kids who want to be there, want to immerse themselves in creating, and have fun learning new things.  As I go into the new school year uncertain as to where I will end up, I am confident that I will be able to look back on this experience and remember how much fun I can have while teaching.  I feel privileged to be able to try out new lessons and teaching techniques during my summer and truly enjoy the experience.

      Not many people can say that they taught or assisted in photography, architecture, circus skills, and art techniques from around the world all in one summer! Tomorrow is the last day of camp, and instead of looking forward to a week of free time I am sad to leave such a wonderful working environment.  Here's to next summer and six more weeks of amazing experiences!