
 |
| Drawing a still life requires that you look directly at the objects, not draw them from memory. |

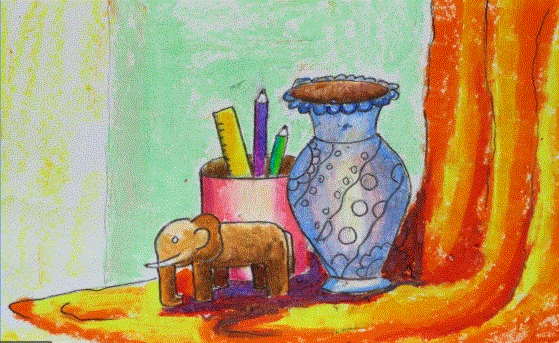 Create a fun still life by drawing objects you
collected for your found object color wheel!
Create a fun still life by drawing objects you
collected for your found object color wheel!
VOCABULARY:
 Composition
- the placement or
arrangement of visual elements or 'ingredients' in a work of art
Composition
- the placement or
arrangement of visual elements or 'ingredients' in a work of art
Still Life -
A still-life is a
picture of objects that don’t move. Often vases, bowls of fruit, bottles,
etc. The artist sets up a still-life
usually in the studio to do a ‘study’ of the objects. It may be a drawing or a painting. The artist looks at the objects and studies
their shape, where the light falls, and the shadows the objects make in
relation to the other objects.

1. After you have taken a picture of your color wheel, choose 3 or more objects that you would
like to draw together and set them aside.
 2. CLEAN UP your color wheel by
putting back your color wheel objects EXACTLY WHERE YOU FOUND THEM
2. CLEAN UP your color wheel by
putting back your color wheel objects EXACTLY WHERE YOU FOUND THEM
3. Arrange the objects you
set aside into a composition that you find pleasing. Groupings of odd numbers , even numbered groupings
arranged in a diamond shape, and having taller objects in the back and smaller
ones in the front are traditional ways to make your composition look great!
 4. Start drawing your
objects by sketching them lightly in pencil, paying attention to the simple
shapes that most closely resemble your items.
(example: when drawing a can of soup, you could start with a tall
rectangle) Don’t forget to sketch in
your background, and make sure you fill in the whole paper- make those objects
nice and big on your paper!
4. Start drawing your
objects by sketching them lightly in pencil, paying attention to the simple
shapes that most closely resemble your items.
(example: when drawing a can of soup, you could start with a tall
rectangle) Don’t forget to sketch in
your background, and make sure you fill in the whole paper- make those objects
nice and big on your paper! 5. Once your objects are sketched in as simple shapes, start refining the edges and adding bigger
details.(example: if you started your can of soup as a rectangle, make the
top edge into a flattened oval/elipse and the bottom edge into a curve)
5. Once your objects are sketched in as simple shapes, start refining the edges and adding bigger
details.(example: if you started your can of soup as a rectangle, make the
top edge into a flattened oval/elipse and the bottom edge into a curve)
6. The next step is
drawing in the details on your objects.
(example: what is on the soup can’s label? Are the top and bottom edges
a little wider than the rest of the can?
If you are including words, don’t forget to show the curve of the can by
curving the words!)
 7. If available, start
adding color. If you have no color
available, try shading with a pencil or pen!
Pay close attention to your lighting.
Is one side of your objects lighter or darker than the other? Are there any shadows? What direction are they going in?
7. If available, start
adding color. If you have no color
available, try shading with a pencil or pen!
Pay close attention to your lighting.
Is one side of your objects lighter or darker than the other? Are there any shadows? What direction are they going in?
REFLECTION QUESTIONS
for after you finish creating your still life:
1.
When
creating this still life, what was the easiest part for you?
2.
When
creating this still life, what was the most difficult part for you?
3.
How
did you work your way through the tough parts?
4.
How
do you feel about the finished project?
SUNSHINE STATE
STANDARDS
VA.K.S.3.1, VA.1.S.3.1, VA.2.S.3.1, VA.3.S.3.1, VA.4.S.3.1, VA.5.S.3.1
For even more detailed instructions about how to draw a
still life:
(lots of pop-up ads, but good info)
https://feltmagnet.com/drawing/How-to-Draw-Still-Life
(lots of pop-up ads, but good info)
Some images are from:
http://www.artstudioguelph.com/still-life-composition/
https://www.youtube.com/watch?v=usmpfAO18Io


