Showing posts with label middle school art. Show all posts

Friday, May 8, 2020

Cardboard Tube Sculpture

by Elizabeth Van Allen for scribblesbyartteachervanallen.blogspot.com 

Original idea from the Facebook Art Teachers Group
Subject: 3D art, e-learning
Level:middle school +/-

Wednesday, April 29, 2020

Value Scale Scavenger Hunt

by Elizabeth Van Allen for scribblesbyartteachervanallen.blogspot.com 
Original idea from the Facebook Art Teachers Group, the Art of Education site, and Art with Trista
Subject2D art, e-learning
Level:middle school +/-

For a visual example of how to do this, see 
Art with Trista's Found Object Value Scale on youtube by clicking here

Friday, April 24, 2020

Object vs Contour Drawing

by Elizabeth Van Allen for scribblesbyartteachervanallen.blogspot.com 

Original idea from the Facebook Art Teachers Group
Subject: 3D art, e-learning
Level:middle school +/-


Wednesday, April 22, 2020

Letters Around Us

by Elizabeth Van Allen for scribblesbyartteachervanallen.blogspot.com 

Subject2D art, e-learning
Level:middle school +/-

Monday, April 13, 2020

Recreating Artwork: Accept the Challenge!

by Elizabeth Van Allen for scribblesbyartteachervanallen.blogspot.com 
project by Danette Albino-Rodriguez, edited by Elizabeth T. Van Allen

Subject3D art, e-learning, Art Criticism
LevelAll Ages

Recreating Artwork: 
Accept the Challenge!
Two museums across the globe from each other have issued a challenge to the world: to re-create your favorite art using objects lying around your home. The Rijksmuseum in Amsterdam (the Netherlands) to the Getty in Los Angeles (USA), have both taken to social media to engage their friends and followers in this fun activity.  We are among the many who are going to rise to the challenge as this week we recreate some amazing artworks!

Our Objectives: 
1. To use your art criticism skills by describing, analyzing, and interpreting an artwork.
2. To recreate an artwork by using objects found in your home, yourself, your family or pets, or whatever you have available.  (DO NOT RE-DRAW OR RE-PAINT THE ARTWORK)

Criteria and Steps:  
1) Decide which artwork you want to recreate.  You can choose an artwork from the suggested list or you can choose your own.  I
have provided a list of suggested artworks in EDSBY.  If you want to recreate an artwork that is not suggested and if you are going to look it up online, please do so with adult supervision.
2) Critique the artwork.  You will describe, analyze, and interpret the artwork you chose in a "test" on EDSBY.  It will not count as a test, we're just using that format because it allows for written answers.
3) Look for objects around the house to recreate the artwork.  You can also have "models" (yourself, family, pets, etc.). You are NOT trying to redraw or repaint an artwork.
4) Arrange your objects or model to match the artwork and take a picture.  Pose everything the same way they are posed in the original artwork.
5) Submit/Upload the picture to the assignment on EDSBY.  Please include a note with the name of the artwork, artist, year it was made, and medium (if available)

What is Art Criticism?
Art criticism is about learning to talk about art in a deeper and more meaningful way.  There are four steps to art criticism:
1. Describe- When you are describing a piece of artwork, you are listing what you see in the artwork.
2. Analyze- When you are analyzing a piece of artwork, you are identifying how the artist used the elements (line, shape, form, color, etc) and principles of art (emphasis, movement, etc.) in the artwork.

3. Interpret- When you are interpreting a piece of artwork you are figuring out the meaning or the story of the artwork.
4. Judge- Making decisions about the artwork (This painting works or doesn't work because...)

*In your assignment on EDSBY I have included two .pdf files.  One is the assignment with more examples and details, and the other is a list of suggested artworks.  DISCLAIMER: If you'd like to look for and re-create an artwork that isn't on the list, make sure you have adult supervision... not all artwork is necessarily for all ages!

Wednesday, April 8, 2020

Choice Drawing: Middle School

by Elizabeth Van Allen for scribblesbyartteachervanallen.blogspot.com 

Subject: 2D art, e-learning
Level:middle school and older

Tuesday, April 7, 2020

This Sculpture is For the Birds!

by Elizabeth Van Allen for scribblesbyartteachervanallen.blogspot.com 

Subject3D art, e-learning
Level:middle school, but can be modified for almost any age 


This Sculpture is for the Birds!
 In-The-Round Sculpture Using Available Resources
OBJECTIVES:

I will create one recognizable sculpture in-the-round of a bird from an original 4-view drawing using my available resources.  My sculpture may be lasting or impermanent, small or large
So that I understand how to work with limited resources in order to accomplish a concrete goal
I will know I have it right when I have created a sculpture of a bird using the resources that I have available to me, and it is clearly recognizable to any viewer.

REQUIREMENTS:
Students will:
1. Brainstorm­­­­­­ 2 ideas for your bird sculpture (different positions or species).
2. Choose 1 sketch and draw it from 4 different views: front, side, back, and top.  .
3. Submit sketches through EDSBY
4. Re-create the drawing in sculpture form
5. Photograph the sculptures from all 4 angles that were originally drawn
6. Complete the project in a timely manner
7. Submit pictures from all 4 angles that you drew to the teacher through EDSBY
8. Clean up

TIME BUDGET:
7 working classes:
1 class- Sketch
2 classes- 4-View Drawings
4 classes- Sculpture

VOCABULARY:

Sculpture In-The-Round sculpture that is meant to be viewed from all angles
Consumable Resources – Objects or materials that are meant to be used up and replaced (paints are consumable resources, paint brushes are non-consumable)
Found Object – objects or products that are not normally considered materials from which art is made often because they already have a non-art function.
Multi-View DrawingA multi-view drawing is one that shows two or more two-dimensional views of a three-dimensional object. • Multi-view drawings provide the shape description of an object. • When combined with dimensions, multi- view drawings serve as the main form of communication between designers and manufacturers.
Sketch – a quick or rough drawing an artist makes to express ideas that are intended to be used in later works
Impermanent Art (also called temporary art) – art that is not intended to be permanent or last a long time

MATERIALS:
 ·  paper
·  pencil or pen
·  Objects from around the house and/or consumable art supplies
·  Camera/camera phone
·  Computer


DIRECTIONS
1.    Read the lesson plan thoroughly, including all vocabulary
2.    Brainstorm­­­­­­: Sketch out 2 ideas for your bird sculpture (different positions or species).  Think about your project- do you want to show your bird flying, nesting, walking, floating, etc.?  What type of bird do you want to show- tropical, migrating, non-flying, common, exotic, etc.?  Keep in mind the materials you have available to work with while you are brainstorming.
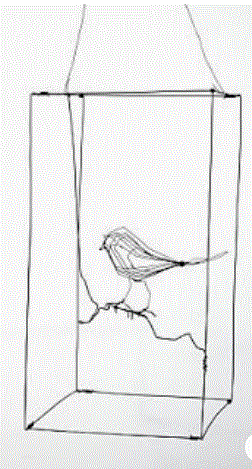
Even though this isn't a
bird, it's a great example
of a 4-view drawing!
3.    Choose 1 idea/sketch and draw it from 4 different  views: front, side,back, and top.  Sketches must be to scale with each other, and be drawn on the same page as each other.  Your 4 drawings should take up the entire page/ each sketch uses ¼ page.  HINT: if you’re having a difficult time with the 4-view drawing, look up images of wood carving patterns and bird decoy patterns.  Using these multi-view drawings is standard when creating sculpture and wood carving, and images like this are very common!

4.    Submit sketches through EDSBY
5.    Collect, with permission, materials from around the house to use for your sculpture.  If you are using consumable resources (paint, air-dry clay, foil, paper, tape, wire, etc.), make sure you have a dedicated working area that can be used for this purpose.

6.    CAREFULLY re-create the drawings in sculpture form, checking each view for accuracy according to your original drawings.
7.    Photograph the sculptures from different angles
8.    Complete the project in a timely manner
9.    Submit pictures from all 4 views that you drew to the teacher through EDSBY
10. Clean up 

REFLECTION QUESTIONS 
for after assembling your bird sculpture
(to be completed as a survey in EDSBY):

1.    What surprised you when making your sculpture?

2.    When creating your sculpture, what was the easiest part for you?


3.    When creating your sculpture, what was the most difficult part for you?

4.    Which part of your sculpture do you think was the most successful and why?

5.    Which part of your sculpture do you think was the least successful and why?

6.    If you were to do this again, what would you do differently?

SUNSHINE STATE STANDARDS
VA.68.C.2.1 Assess personal artwork during production to determine areas of success and needed change for achieving self-directed or specified goals.
VA.5.O.1.2 Organize the structural elements of art to achieve visual unity.
VA.68.O.1.3 Combine creative and technical knowledge to produce visually strong works of art.
VA.5.F.1.1 Examine and experiment with traditional uses of media to apply imaginative techniques in two- and/or three- dimensional artworks 

Monday, April 6, 2020

Found Object Color Wheel & Still Life: Week 2 of 2

by Elizabeth Van Allen for scribblesbyartteachervanallen.blogspot.com 
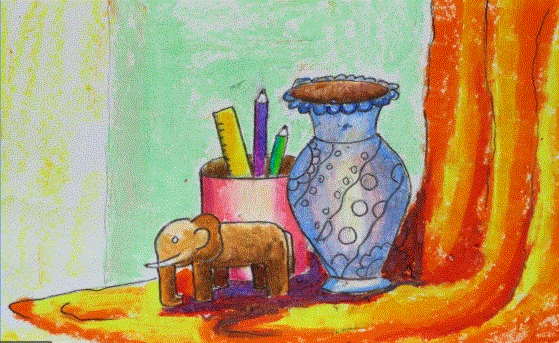
Drawing a still life requires that
 you look directly at the objects,
not draw them from memory.


This 2-part lesson is suggested for grades 4-5 e-learning, homeschool, or in the traditional classroom.  Part 1 can be done with all ages and part 2 is suggested for grades 3 and up.  This lesson was Modified from an original lesson by Ms. Hartnett from Shore Elementary School in Tampa, FL.  To see her original lesson, find her on youtube here!

Find week 1 of 
this lesson here.


WEEK 2: THE STILL LIFE

Create a fun still life by drawing objects you collected for your found object color wheel!

VOCABULARY:
Composition - the placement or arrangement of visual elements or 'ingredients' in a work of art

Still Life - A still-life is a picture of objects that don’t move. Often vases, bowls of fruit, bottles, etc.  The artist sets up a still-life usually in the studio to do a ‘study’ of the objects.  It may be a drawing or a painting.  The artist looks at the objects and studies their shape, where the light falls, and the shadows the objects make in relation to the other objects.

 DIRECTIONS

1.  After you have taken a picture of your color wheel, choose 3 or more objects that you would like to draw together and set them aside.
2.  CLEAN UP your color wheel by putting back your color wheel objects EXACTLY WHERE YOU FOUND THEM
3.  Arrange the objects you set aside into a composition that you find pleasing.  Groupings of odd numbers , even numbered groupings arranged in a diamond shape, and having taller objects in the back and smaller ones in the front are traditional ways to make your composition look  great!
4.  Start drawing your objects by sketching them lightly in pencil, paying attention to the simple shapes that most closely resemble your items.  (example: when drawing a can of soup, you could start with a tall rectangle) Don’t forget to sketch in your background, and make sure you fill in the whole paper- make those objects nice and big on your paper!
5.  Once your objects are sketched in as simple shapes, start refining the edges and adding bigger details.(example: if you started your can of soup as a rectangle, make the top edge into a flattened oval/elipse and the bottom edge into a curve)
6.  The next step is drawing in the details on your objects.  (example: what is on the soup can’s label? Are the top and bottom edges a little wider than the rest of the can?  If you are including words, don’t forget to show the curve of the can by curving the words!)
7.  If available, start adding color.  If you have no color available, try shading with a pencil or pen!  Pay close attention to your lighting.  Is one side of your objects lighter or darker than the other?  Are there any shadows?  What direction are they going in?

REFLECTION QUESTIONS 
for after you finish creating your still life:

1.    When creating this still life, what was the easiest part for you?

2.    When creating this still life, what was the most difficult part for you?

3.    How did you work your way through the tough parts?

4.    How do you feel about the finished project?

SUNSHINE STATE STANDARDS

VA.K.S.3.1, VA.1.S.3.1, VA.2.S.3.1, VA.3.S.3.1, VA.4.S.3.1, VA.5.S.3.1

RESOURCES

For even more detailed instructions about how to draw a still life: 
(lots of pop-up ads, but good info)
https://feltmagnet.com/drawing/How-to-Draw-Still-Life
Some images are from: 
http://www.artstudioguelph.com/still-life-composition/
https://www.youtube.com/watch?v=usmpfAO18Io

Monday, March 30, 2020

Person, Place and Thing: Found Object Impermanent Sculptures

by Elizabeth Van Allen for scribblesbyartteachervanallen.blogspot.com 

This impermanent sculpture 'place'
 is a home, complete with
front walk, garage, and tin box car!
Created for e-learning with middle school 3D art students, but can be modified for upper elementary and older.  This is a great way to work with sculpture without worrying about storage, and to experience creating impermanent art in a controlled environment!


OBJECTIVES:

I will create three impermanent (temporary) sculptures out of found objects: a person, a place, and a thing.

So that I understand how some art is temporary, only lasting through images, and that it can be made out of everyday objects found around our everyday environments

I will know I have it right when I have created 3 sculptures, a person, a place, and a thing, taken pictures, and returned the objects to their original places.

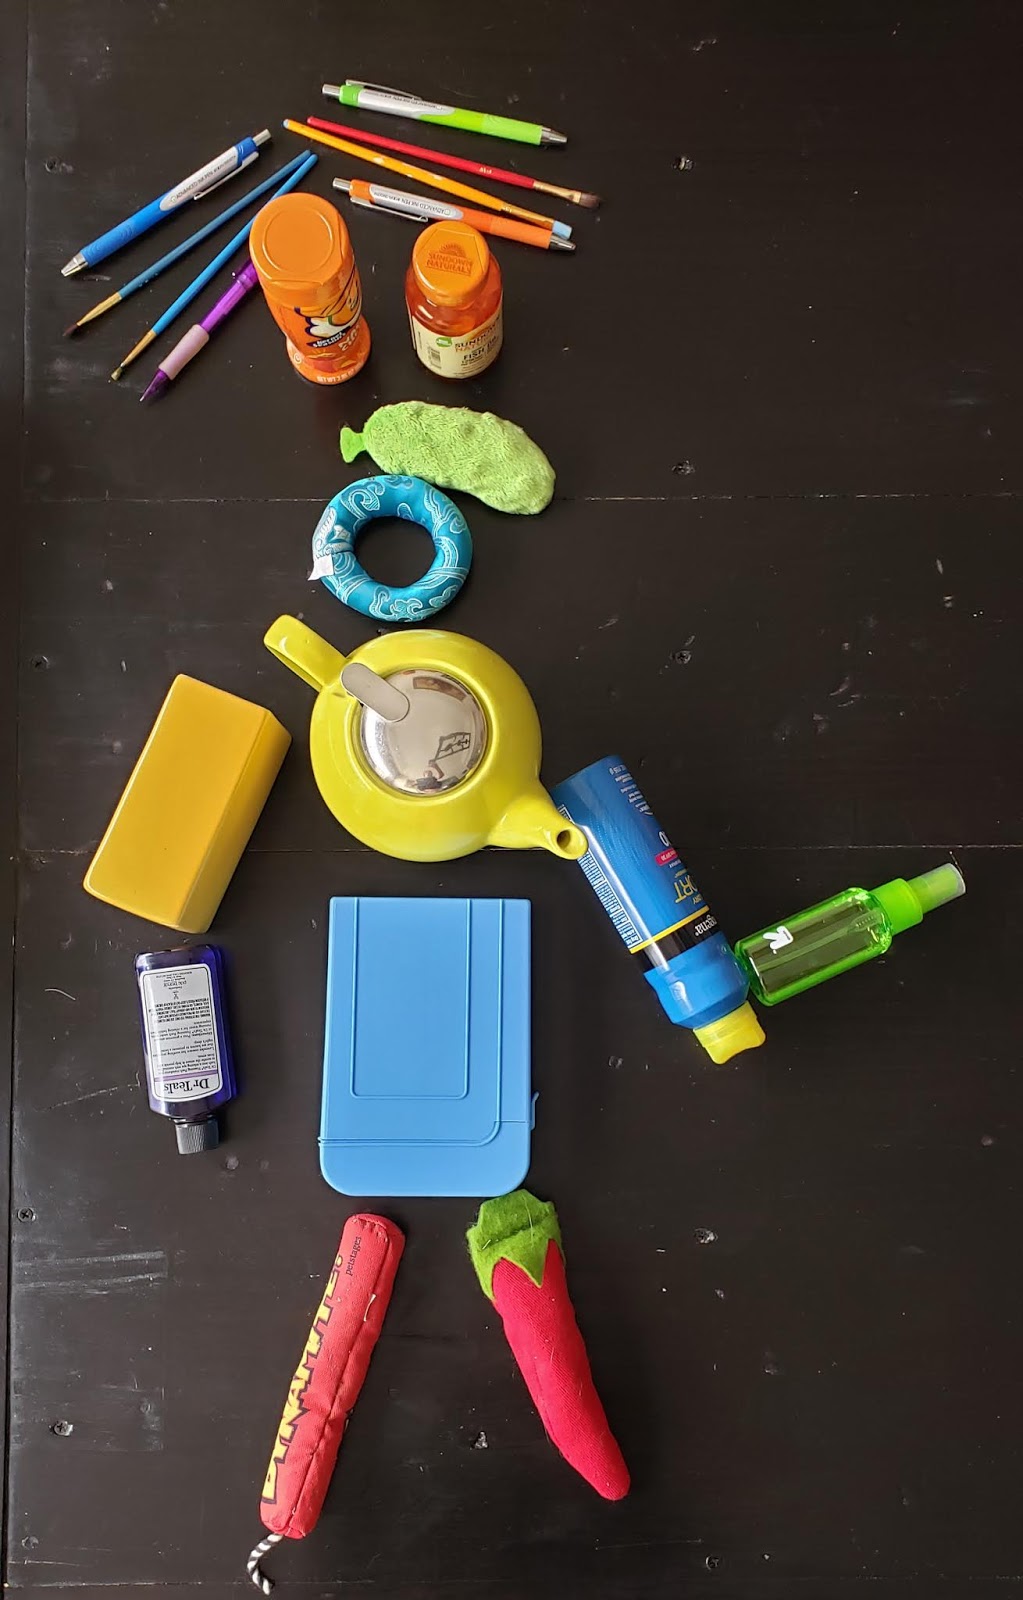
This impermanent sculpture
 'person' was built horizontally
instead of vertically
REQUIREMENTS:

Students will:
1. Brainstorm­­­­­­: Sketch out 3 ideas for found object sculptures: a person, a place, and a thing or object.  These sketches will be recreated from objects from around the house. 
2. Submit sketches through EDSBY
3. Collect, with permission, objects from around the house to use for the sculptures
4. CAREFULLY re-create the sketches in sculpture form
5. Photograph the sculptures from different angles
6. Complete the project in a timely manner
7. Submit all 3 pictures with the teacher through EDSBY
8. Clean up by carefully putting all objects back where they belong

VOCABULARY:

Composition - the placement or arrangement of visual elements or 'ingredients' in a work of art
Found Object – objects or products that are not normally considered materials from which art is made, often because they already have a non-art function.
Sketch – a quick or rough drawing an artist makes to express ideas that are intended to be used in later works
Impermanent Art (also called temporary art) – art that is not intended to be permanent 
Make sure you have permission
 to use the found objects you
gather from around your home!

TIME BUDGET:
1 week

MATERIALS:
·  paper
·  pencil or pen
·  Objects from around the house
·  Camera/camera phone

DIRECTIONS

1.    Read the lesson plan thoroughly, including all vocabulary
2.    Brainstorm­­­­­­: Sketch out 3 ideas for found object sculptures: a person, a place, and a thing or object.  These sketches will be recreated from objects from around the house. 
3.    Submit sketches through EDSBY
4.    Collect, with permission, objects from around the house to use for the sculptures
5.    CAREFULLY re-create all 3 sketches in sculpture form.  Be mindful of the environment you’re building in, that is also the place that will be viewed in the pictures!
6.    Photograph the sculptures from different angles
7.    Submit all 3 pictures with the teacher through EDSBY
8.    Clean up by carefully putting all objects back where they belong


This impermanent sculpture 'object/thing' is an ice cream truck!

REFLECTION QUESTIONS 
for after assembling your impermanent sculpture 
(to be completed as a survey in EDSBY):


1.    What surprised you when making your 3 sculptures?


2.    When creating your sculptures, what was the easiest part for you?
  
3.    When creating your sculptures, what was the most difficult part for you?

4.    Which sculpture do you think was the most successful and why?

5.    Which sculpture do you think was the least successful and why?

6.    If you were to do this again, what would you do differently?