Showing posts with label still life. Show all posts

Monday, April 6, 2020

Found Object Color Wheel & Still Life: Week 2 of 2

by Elizabeth Van Allen for scribblesbyartteachervanallen.blogspot.com 
Drawing a still life requires that
 you look directly at the objects,
not draw them from memory.


This 2-part lesson is suggested for grades 4-5 e-learning, homeschool, or in the traditional classroom.  Part 1 can be done with all ages and part 2 is suggested for grades 3 and up.  This lesson was Modified from an original lesson by Ms. Hartnett from Shore Elementary School in Tampa, FL.  To see her original lesson, find her on youtube here!

Find week 1 of 
this lesson here.


WEEK 2: THE STILL LIFE

Create a fun still life by drawing objects you collected for your found object color wheel!

VOCABULARY:
Composition - the placement or arrangement of visual elements or 'ingredients' in a work of art

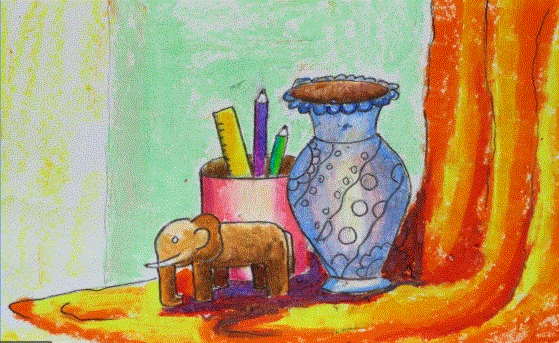
Still Life - A still-life is a picture of objects that don’t move. Often vases, bowls of fruit, bottles, etc.  The artist sets up a still-life usually in the studio to do a ‘study’ of the objects.  It may be a drawing or a painting.  The artist looks at the objects and studies their shape, where the light falls, and the shadows the objects make in relation to the other objects.

 DIRECTIONS

1.  After you have taken a picture of your color wheel, choose 3 or more objects that you would like to draw together and set them aside.
2.  CLEAN UP your color wheel by putting back your color wheel objects EXACTLY WHERE YOU FOUND THEM
3.  Arrange the objects you set aside into a composition that you find pleasing.  Groupings of odd numbers , even numbered groupings arranged in a diamond shape, and having taller objects in the back and smaller ones in the front are traditional ways to make your composition look  great!
4.  Start drawing your objects by sketching them lightly in pencil, paying attention to the simple shapes that most closely resemble your items.  (example: when drawing a can of soup, you could start with a tall rectangle) Don’t forget to sketch in your background, and make sure you fill in the whole paper- make those objects nice and big on your paper!
5.  Once your objects are sketched in as simple shapes, start refining the edges and adding bigger details.(example: if you started your can of soup as a rectangle, make the top edge into a flattened oval/elipse and the bottom edge into a curve)
6.  The next step is drawing in the details on your objects.  (example: what is on the soup can’s label? Are the top and bottom edges a little wider than the rest of the can?  If you are including words, don’t forget to show the curve of the can by curving the words!)
7.  If available, start adding color.  If you have no color available, try shading with a pencil or pen!  Pay close attention to your lighting.  Is one side of your objects lighter or darker than the other?  Are there any shadows?  What direction are they going in?

REFLECTION QUESTIONS 
for after you finish creating your still life:

1.    When creating this still life, what was the easiest part for you?

2.    When creating this still life, what was the most difficult part for you?

3.    How did you work your way through the tough parts?

4.    How do you feel about the finished project?

SUNSHINE STATE STANDARDS

VA.K.S.3.1, VA.1.S.3.1, VA.2.S.3.1, VA.3.S.3.1, VA.4.S.3.1, VA.5.S.3.1

RESOURCES

For even more detailed instructions about how to draw a still life: 
(lots of pop-up ads, but good info)
https://feltmagnet.com/drawing/How-to-Draw-Still-Life
Some images are from: 
http://www.artstudioguelph.com/still-life-composition/
https://www.youtube.com/watch?v=usmpfAO18Io

Monday, March 30, 2020

Found Object Color Wheel & Still Life: Week 1 of 2

by Elizabeth Van Allen for scribblesbyartteachervanallen.blogspot.com 
The Found Object Color Wheel

This 2-part lesson is suggested for grades 4-5 e-learning, homeschool, or in the traditional classroom.  Part 1 can be done with all ages and part 2 is suggested for grades 3 and up.  This lesson was Modified from an original lesson by Ms. Hartnett from Shore Elementary School in Tampa, FL.  To see her original lesson, find her on youtube here!

This incredibly fun lesson is fun to do solo or with others, as a kid or as an adult!

WEEK 1: THE COLOR WHEEL
Create a color wheel out of objects found around your home!

OBJECTIVES:
I will Create a color wheel made out of found objects, choose and arrange 3, and draw them as a still life!
So that I can demonstrate my knowledge of color theory in a different way and learn more about still life.
I will know I have it right when I have found at least 3 objects of each color in the color wheel, I have arranged the objects neatly in circle or wheel, my colors are in rainbow order and I have chosen, arranged, and carefully drawn 3 or more objects from my color wheel as a still life

REQUIREMENTS:
Students will:
1. Create a color wheel out of found objects from around their home or environment
2. Submit a picture through EDSBY
3. Select 3 or more objects from the color wheel to draw as a still life
4. Draw the still life
5. Share a picture with the teacher through EDSBY

VOCABULARY:
Color Wheel - a circular chart that shows primary and secondary colors.  More advanced color wheels also include tertiary, or intermediate colors.
Primary Colors – The three primary colors are red, yellow, and blue. They are the only colors that cannot be made by mixing two other colors
Secondary Colors - The three secondary colors are green, orange, and violet. They are each a mixture of two primary colors.
Tertiary (or intermediate) Colors - The six tertiary colors are red-orange, red-violet, yellow-green, yellow-orange, blue-green, and blue-violet. They are made by mixing a primary color with an adjacent secondary color.

TIME BUDGET:
2 classes, 1 per activity


MATERIALS:
·  Objects from around the house
·  Camera/camera phone
·  paper
·  pencil or pen
· any other art supplies you may have access to

DIRECTIONS
1.    While gathering at least 3 objects of each color from around your home, make sure you have permission to use and photograph what you gather!

2.    Find all the colors in the classic color wheel (using primary and secondary colors only) and arrange them in a “wheel” or circle in the correct rainbow order: Red, Orange, Yellow, Green, Blue, Purple/Violet! Find at LEAST 3 objects of each color. The more objects you find, the more colorful your color wheel will be!

3.  Take a picture of your colorful creation to share with friends, family and of course, Ms. Van Allen for credit and feedback!

4.  Share the picture with your art teacher through EDSBY!

REFLECTION QUESTIONS 
for after assembling your color wheel:
1.    What surprised you when making your Found Object Color Wheel?

2.    What was the most “unique” object you found and why?
(Mine was the green googly eyes magnet clip!)

3.    What object/objects are most reflective of you? How so? 
(Mine was the green beaded necklace, because it is a handmade gift from my mother)

4.    What steps did you take when arranging your objects? Why did you create it that way?


SUNSHINE STATE STANDARDS
VA.K.S.3.1, VA.1.S.3.1,
VA.2.S.3.1, VA.3.S.3.1,
VA.4.S.3.1, VA.5.S.3.1

Stay-At-Home Still Life

by Elizabeth Van Allen for scribblesbyartteachervanallen.blogspot.com


*this lesson is suggested for grades 6 and 
up e-learning or traditional classroom

It's March 2020 and here in the US we are currently in the age of safer-at-home and self-quarantine due to Covid-19.  With our current new normal and the rise of E-Learning, I present to you my first  2D art online lesson plan: Stay-At-Home Still Life!


Stay-At-Home Still Life
OBJECTIVES:

I will create an original still life that represents my own experience with staying at home during the Covid-19 event and that incorporates symbolism.

So that I can make more sense of what is going on around me and create art in response to current events

I will know I have it right when I have created a finished, high-quality still life that includes symbolism using the items I have with me at home.

REQUIREMENTS:
Students will:
1. Brainstorm­­­­­­
2. Create 2 completely different sketches
3. Develop 1 into a finished artwork
4. Complete the project in a timely manner
5. Complete a self-evaluation

VOCABULARY:
Composition - the placement or arrangement of visual elements or 'ingredients' in a work of art
Event - something that happens at a given place and time or a special set of circumstances
 Medium - the materials that are used to create a work of art
 Still Life - a work of art depicting mostly inanimate subject matter, typically commonplace objects which are either natural (food, flowers, dead animals, plants, rocks, shells, etc.) or man-made (drinking glasses, books, vases, jewelry, coins, pipes, etc.).
Symbolism - using an object or a word to represent an abstract idea. 
Example: A red rose, or the color red, may stand for love or romance. Black is a symbol that represents evil or death. A ladder may stand as a symbol for a connection between heaven and earth. 

MATERIALS:
 ·  planning sheets (printer or lined paper)

·  pencil or pen
·  any other art supplies you may have access to – if you have nothing else, get creative!
Use coffee or tea to shade in areas between pen lines!  Collage together (clean) food wrappers in different colors to create images.  Use the back of cardboard packaging (cereal boxes etc.) as paper if you have none.  

DIRECTIONS

1.    Brainstorm a list of at least 5 things that are important to you during this safer-at-home period.  They can be literal objects (hand soap, face mask, canned food, etc.) or they can be symbolic, meaning that they stand for something else (an idea, a place, an activity, a person etc.).  You must have access to these items, as you will be drawing directly from them.

2.   Gather at least 3 of those items, at least 1 of which should be symbolic, and sketch 2 completely different compositions.  Don’t forget to include a background!

3.   Choose 1 to develop into a finished artwork
4.   Sketch the idea out lightly and completely.  Remember to start with simple shapes in order to draw your objects more accurately!
5.   Finish the project completely in high-quality way.  Your medium (what you create with) is up to you, based on what you have access to at home.  Don’t let a lack of resources limit your creativity.  Remember- if all you have is pen and notebook paper, make it the best still life using pen and notebook paper you have ever seen!

TIME BUDGET:
  1 week (5 days)

SUNSHINE STATE STANDARDS
VA.68.C.1.1- Apply a range of interests and contextual connections to influence the art-making and self-reflection process
VA.68.S.1- the arts are inherently experiential and actively engage learners in the processes of creating, interpreting, and responding to art.
VA.68.O.3 – Every art form uses its own unique language, verbal and non-verbal, to document and communicate with the world.
VA.68.H.2 – The arts reflect and document cultural trends and historical events, and help explain how new directions in the arts have emerged.

All images are from the painting subreddit.